The Beginner’s Guide to the Hip Thrust Machine
The hip thrust machine is one of the most trusted methods of strengthening your glutes. Short for the gluteal muscles, your glutes are what you sit on all day if you have an office job… And when you’re sitting, they aren’t getting any exercise.
But when you’re not sitting down, your glutes play a huge role in the way you move. Whether you’re walking, running, squatting, or climbing stairs, they power, drive, and stabilize every movement you make with your legs. As a result, incorporating a glute workout into your fitness routine is highly recommended.
With versatility for all skill levels and a proven ability to inspire results, hip thrusts are one of the most practiced glute exercises. The hip thrust machine helps people perfect form and add greater resistance, making it the best way to isolate your glutes for maximum gains while keeping everything safe and secure.
Hip thrusts can be performed without any equipment, with a bench and barbell, or with a hip thrust machine. However, a hip thrust with a barbell can require higher skill and technique to execute correctly.
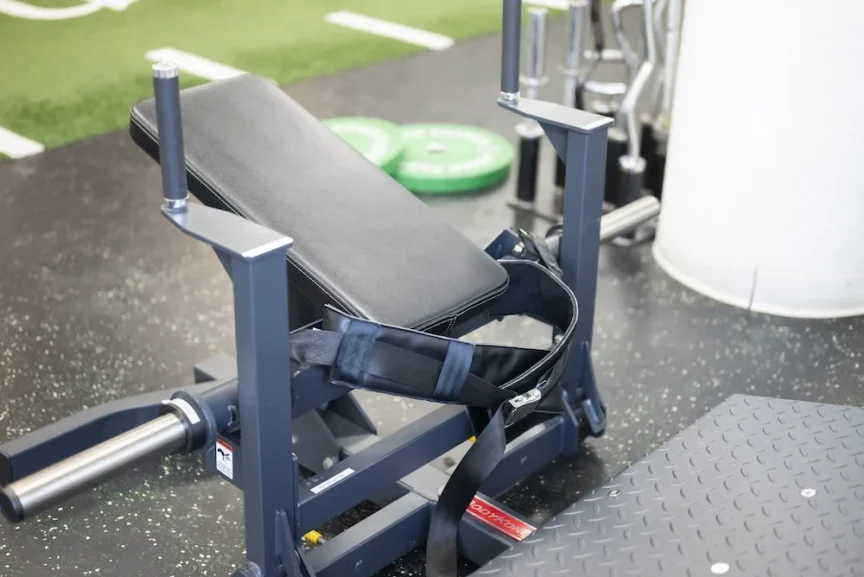
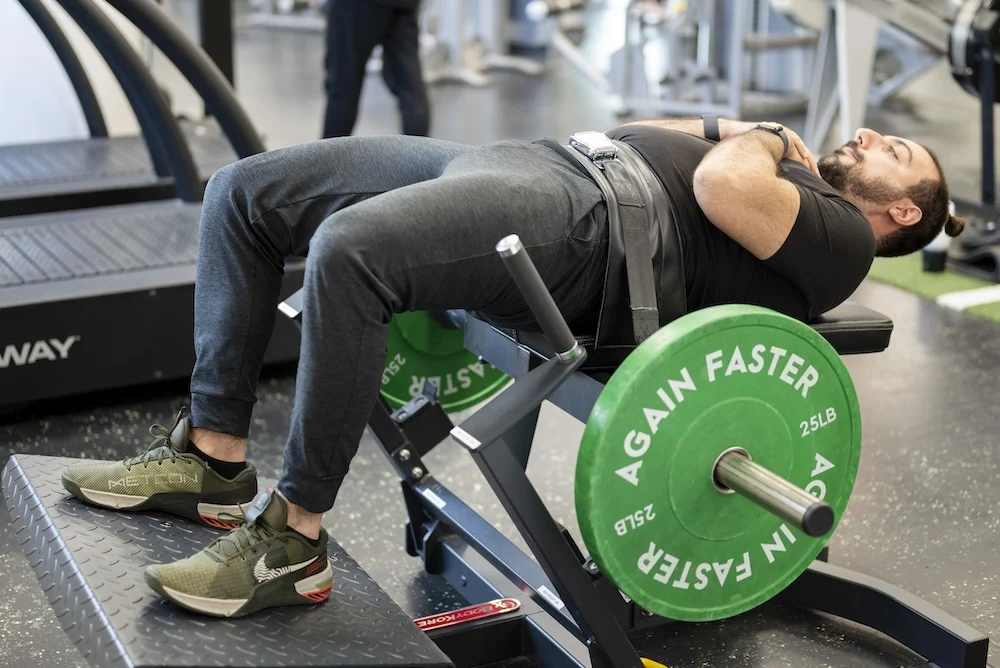
How to set up the machine
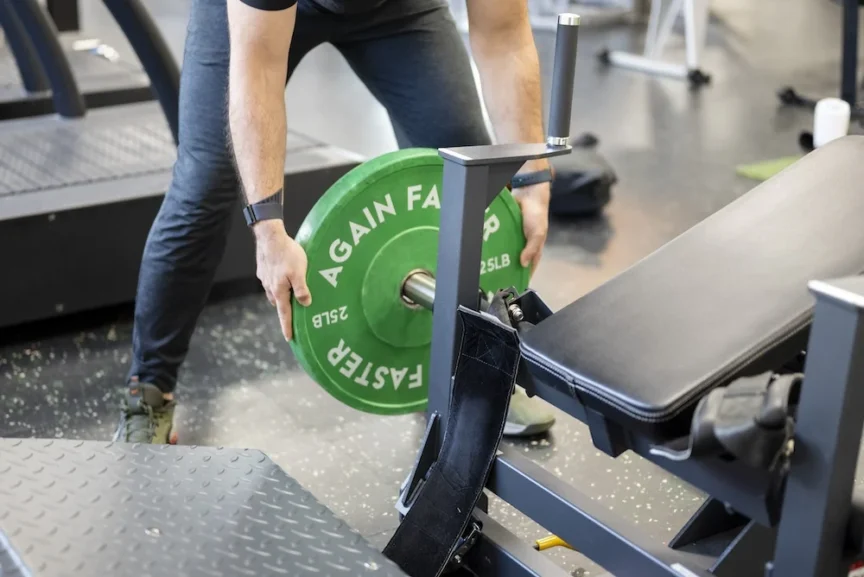
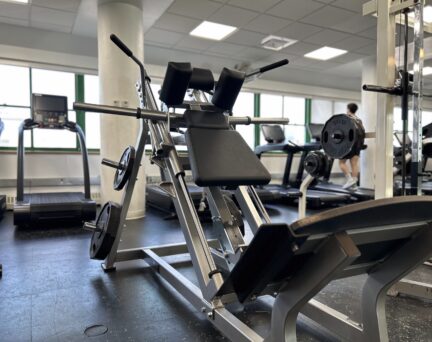
The only adjustment you need to make to set up the machine is to choose the weight. The machines in our fitness center are BodyKore hip thrust models. They can accommodate weights up to 360 pounds (180 pounds per side).
But 350 pounds is too much for a beginner. For most of us, our lower body muscles are the most powerful muscle groups. It can be tempting to overdo it when working out our legs.
If you are a total beginner, it’s best to try a few reps on the machine without adding any weight at all to get a feel for it. If you are more experienced in the gym, start with low weight and focus on form. A good rule of thumb is to start with about half your body weight and work up from there.
Once you’ve decided on a weight that’s right for you, just load weight plates onto the bars on each side of the machine. Be sure to keep the weight on each side evenly balanced, or you could hurt yourself or damage the equipment.
Using the Machine
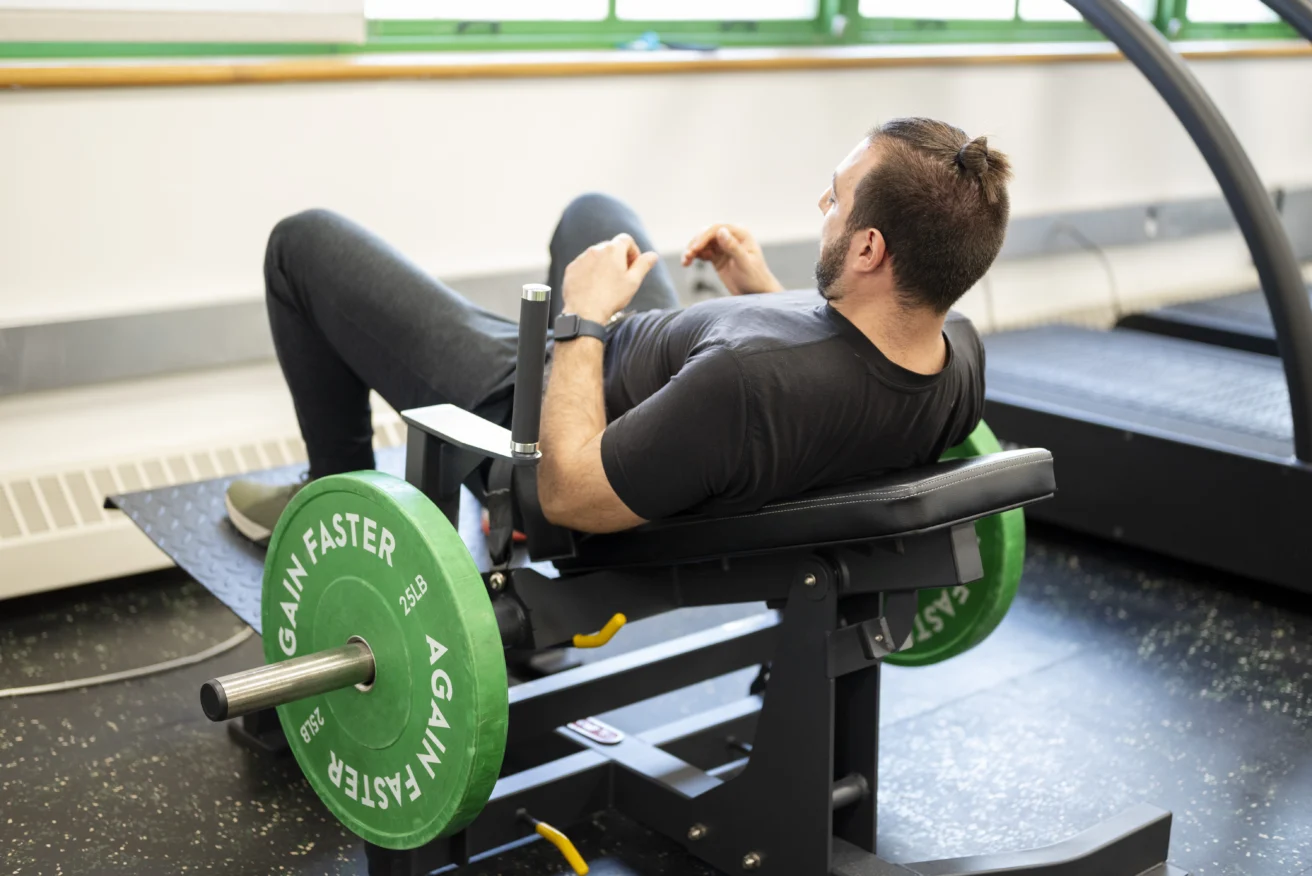
To begin, lie down on the back pad and strap yourself in with the waistband. BodyKore machines use a sturdy and easily adjustable Buckle Belt. Other machines use buckles. The band should be tight around your waist, but not so tight that it restricts your breathing.
Next, position your feet. They should be shoulder-length apart and your feet should be slightly splayed. You’ll place your feet higher or lower on the platform depending on your height.
Once your feet are positioned properly, push up with your hips until you’re fully locked out at the top position. This will provide clearance so you can release the two safety levers on either side. Now you’re ready to get going with your first rep.
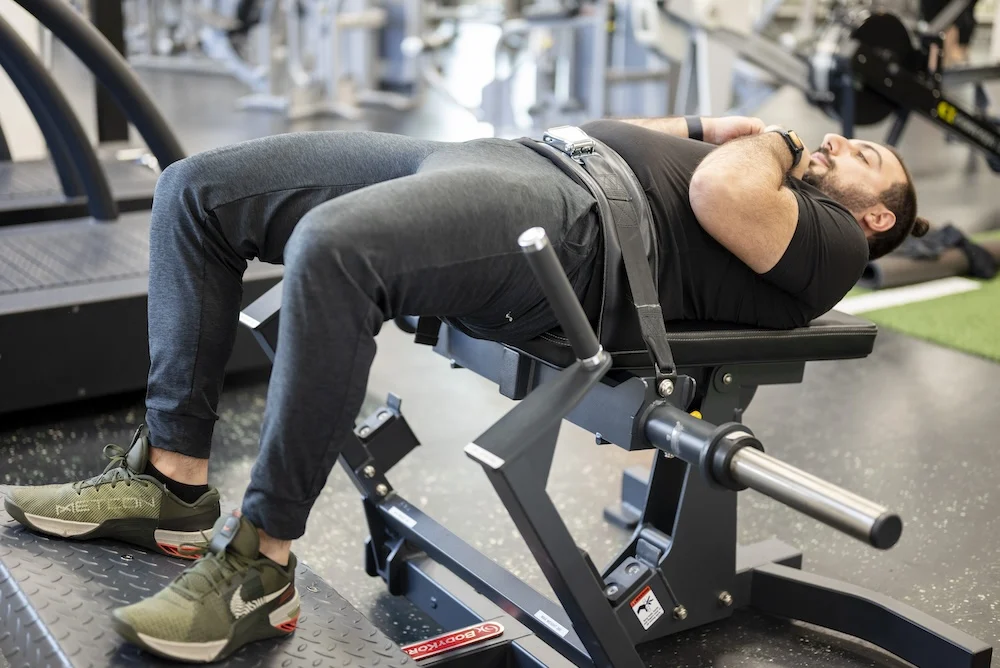
Lower your hips down into the starting position. Get as low as you can, but don’t let the bottom of the machine hit the floor. You want your legs tensed throughout the entire exercise. Keep your core braced throughout the movement.
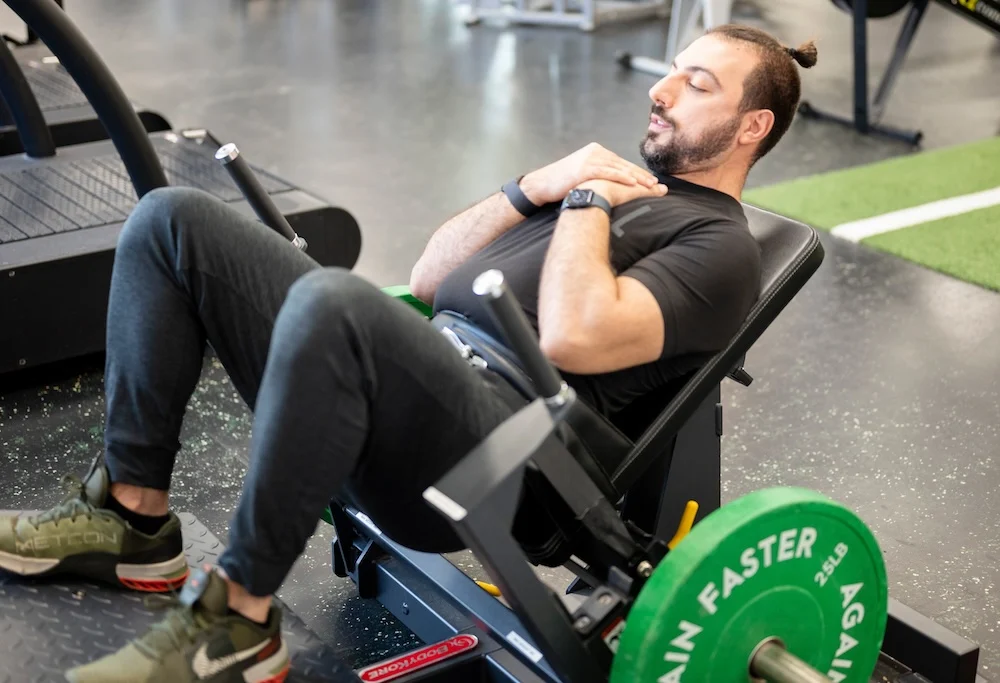
From the starting position, push your hips up toward the ceiling. The upward motion should be quick and explosive to get the most out of this exercise. Stop when your legs are in line with your back, and your knees are at about a 90-degree angle.
Be careful not to overextend yourself at the end of the movement! Pushing your hips too high puts strain on your spine and lower back muscles and could result in injury. Fortunately, hip thrust machines prevent overextension with proper setup, but it’s always best to aim for a full extension to practice proper form. Always keep your motion controlled.
From the extended position, slowly lower your hips back into the position you started from. Keep this part of the motion slow and controlled, and remember to keep your legs and core engaged. If you’re using your maximum weight, rest for a second at the bottom range after each rep. Repeat this movement until you’ve reached your target number of reps.
Once you’re done, resume the extended position and pull the handles toward you to lock the machine. Then, gently lower your hips until the bottom of the machine contacts the locking bar. Unstrap the waist band and you’re ready for the next part of your workout!
What’s a Good Workout?
Hip thrust exercises should be a staple of any leg day. Plenty of exercises work out your glutes, but nothing isolates them quite like the hip thrust machine. For a complete leg workout, focus the rest of your routine on your quads and calves.
Warm-up
- Assault Bike 3 min
- Mini Lateral Band Walk 2×40 yards
- Mini Monster Walks 2×40 yards
- Single Leg Bridge 2×12
Strength
A1) Hip Thrust
- Warm-up sets 2×10-12
- Work sets 3×8
B1) Walking Lunges 3×20
C1) Lower-body superset (light weight)
- Leg Curls 3×15
- Leg Extensions 3×15
D1) Lower Body Conditioning (no weight)
- Sled Push x 3min
Ready to work the hip thrust machine into your workout?
You can find the machine at our Upper East Side and Battery Park City campus fitness centers.
For more personalized instruction, you can also book a session with one of our nationally certified personal trainers to take your workout to the next level!